Are you looking for engaging and creative craft projects to keep your kids entertained and stimulated? Look no further!
In this article, we will explore 10 fun and easy craft projects that will ignite your child's imagination and foster their artistic skills.
From making paper plate animals to creating beautiful tissue paper suncatchers, these step-by-step projects are designed to provide an enjoyable and rewarding experience for both you and your little ones.
Get ready to embark on a journey of creativity and freedom with these exciting craft ideas!
Paper Plate Animals
The article explores the creation of various paper plate animals through fun and easy craft projects for kids. Paper plate crafts are a great way to engage children in creative activities while also teaching them about different animals.
With just a few simple materials, kids can transform ordinary paper plates into their favorite animal characters. To start, gather some paper plates, colored construction paper, scissors, glue, and markers.
Begin by drawing or tracing the outline of the animal onto the paper plate. Then, cut out the necessary features like ears, snouts, or tails from the construction paper and glue them onto the plate. Use markers to add details like eyes, mouth, or fur.
The possibilities are endless with this animal themed craft, giving kids the freedom to unleash their imagination and create their own unique paper plate animals.
Homemade Playdough
Homemade playdough is not only a fun and engaging activity for kids, but it also offers various recipe variations to keep them entertained. From scented playdough to glitter-infused creations, the options are endless.
Additionally, playing with playdough provides sensory benefits, allowing children to explore different textures and develop their fine motor skills.
Playdough Recipe Variations
One popular variation of the playdough recipe is the addition of essential oils for a sensory experience. This not only adds a pleasant scent to the playdough but also provides additional benefits for the child's senses.
Here are four playdough recipe variations that incorporate essential oils:
Calming Lavender: Add a few drops of lavender essential oil to promote relaxation and calmness during playtime.
Energizing Citrus: Incorporate citrus essential oils, such as lemon or orange, to create a refreshing and invigorating playdough experience.
Focus-Boosting Peppermint: Stimulate focus and concentration by adding peppermint essential oil to the playdough mixture.
Soothing Chamomile: Infuse the playdough with chamomile essential oil for a soothing and comforting sensory play experience.
These playdough recipe alternatives not only provide an engaging and creative playtime activity but also offer the added benefits of sensory play.
Sensory Benefits of Playdough
Children's sensory development can be enhanced through the use of homemade playdough and its various sensory benefits. Sensory play is crucial for toddlers as it helps them explore and understand the world around them.
Homemade playdough provides a unique sensory experience that engages multiple senses, including touch, sight, and smell. The malleable texture of playdough allows children to squeeze, mold, and shape it, stimulating their fine motor skills and hand-eye coordination. They can also experiment with different colors and create imaginative creations, fostering their creativity and imagination.
Additionally, adding scents like lavender or peppermint to the playdough can further stimulate their sense of smell. Sensory play ideas for toddlers using playdough include creating patterns, making sculptures, and even incorporating small objects like buttons or beads for added tactile stimulation.
Toilet Paper Roll Crafts
As we delve into the realm of crafting with children, let us now explore the creative possibilities of toilet paper roll crafts. These simple and inexpensive materials can be transformed into a multitude of fun and imaginative projects. Here are four exciting ideas to get you started:
Toilet Paper Roll Animals: Cut and decorate the rolls to create adorable animals like lions, elephants, and giraffes. Use construction paper, googly eyes, and markers to add details and bring your creatures to life.
Toilet Paper Roll Crafts for Holidays: Celebrate special occasions by making festive crafts. Create spooky Halloween characters, such as bats and mummies, or make colorful Christmas ornaments to hang on the tree.
Binoculars: Tape two rolls together and decorate them with paint or stickers. Your little ones can use them for pretend play or even go on a nature scavenger hunt.
Pencil Holder: Cover a toilet paper roll with decorative paper or fabric and glue it together. Voila! You have a stylish and functional pencil holder for your child's desk.
With toilet paper roll crafts, the possibilities are endless. Let your imagination run wild and enjoy the freedom of creating something unique and special.
DIY Bird Feeder
Creating a DIY bird feeder is a fun and engaging craft project for children. Not only does it provide an opportunity for creativity and self-expression, but it also encourages a connection with nature through bird watching activities.
Here is a step-by-step guide to making a simple DIY bird feeder.
First, gather the materials needed: a plastic bottle, a wooden dowel or pencil, twine or string, birdseed, and scissors.
Begin by cutting a small circular hole near the bottom of the plastic bottle. Insert the wooden dowel or pencil through the bottle, creating a perch for the birds.
Next, cut two small holes near the top of the bottle and thread the twine or string through, tying it securely.
Popsicle Stick Crafts
Popsicle sticks may seem like a simple craft supply, but they can be transformed into creative masterpieces! From building structures to making adorable puppets, there are endless possibilities for easy popsicle stick crafts.
In this article, we will explore some fun and imaginative ways to use popsicle sticks that will keep kids entertained and unleash their creativity. So, let's grab our popsicle sticks and get ready for some crafty fun!
Creative Uses for Popsicle Sticks
With a little imagination, popsicle sticks can be transformed into unique and versatile crafting materials. Whether you have a bunch of leftover popsicle sticks from summer or you just want to try something different, here are some creative uses for popsicle sticks that will keep your kids entertained and engaged:
Popsicle Stick Bookmarks: Help your kids make their own personalized bookmarks by decorating popsicle sticks with paint, stickers, or markers. They can also add ribbons or tassels for an extra touch of creativity.
Popsicle Stick Picture Frames: Let your kids showcase their favorite photos by making popsicle stick picture frames. They can glue the sticks together in a square or rectangle shape, decorate them with paint or glitter, and then attach a small photo in the center.
Popsicle Stick Puppets: Encourage your kids' storytelling skills by creating popsicle stick puppets. They can draw or print out characters, glue them onto popsicle sticks, and use them to act out their own imaginative stories.
Popsicle Stick Sculptures: Challenge your kids to build their own sculptures using popsicle sticks. They can experiment with different shapes and structures, and even paint or decorate their creations for added flair.
The possibilities are endless when it comes to popsicle stick crafts. Let your kids explore their creativity and have fun with these simple yet versatile materials.
Easy Popsicle Stick Crafts
Popsicle stick crafts offer a multitude of creative opportunities for children to explore their artistic abilities and develop their fine motor skills. One popular and easy craft project is creating a popsicle stick birdhouse.
Here's a step-by-step guide to help you and your child create a charming birdhouse.
First, gather your materials: popsicle sticks, glue, and paint. Start by arranging the popsicle sticks in a square shape, gluing them together to form the base. Then, glue additional sticks vertically along the sides to create the walls.
Next, attach a triangular-shaped roof using popsicle sticks and glue. Once the glue has dried, let your child's creativity shine by painting the birdhouse in vibrant colors.
Another fun popsicle stick craft is making a picture frame. Simply glue popsicle sticks together in a square or rectangular shape, leaving an opening for the photo. Decorate the frame with paint, markers, or stickers. Finally, attach a string or magnet to the back for hanging or displaying.
These easy popsicle stick crafts are not only fun and engaging but also help foster creativity and fine motor skills in children.
Hand Traced Art
The creation of hand traced art is a popular and engaging activity for children of all ages. It allows them to explore their creativity and develop their fine motor skills. Here are four fun and easy hand traced art projects that your kids will love:
Hand Traced Animals: Have your child trace their hand on a piece of paper and then turn it into their favorite animal by adding details like ears, a tail, and facial features. They can use colored pencils, markers, or even paint to bring their animal to life.
Hand Traced Flowers: Help your child trace their hand multiple times to create the petals of a flower. Then, they can add a stem and leaves to complete their beautiful hand traced flower. Encourage them to use different colors and patterns to make each flower unique.
Hand Traced Self-Portrait: Have your child trace their hand on a piece of paper and then draw their face inside the handprint. They can add details like hair, eyes, and a mouth to create a self-portrait that is uniquely theirs.
Hand Traced Family Tree: Help your child trace their hand on a piece of paper and then trace the hands of other family members around it. Label each hand with the person's name and connect them with lines to create a hand traced family tree. This is a great way for children to learn about their family history while creating a meaningful piece of art.
These hand traced art projects are not only fun and easy, but they also allow children to express themselves and explore their creativity. So grab some paper and art supplies, and let your kids' imaginations run wild with these engaging projects!
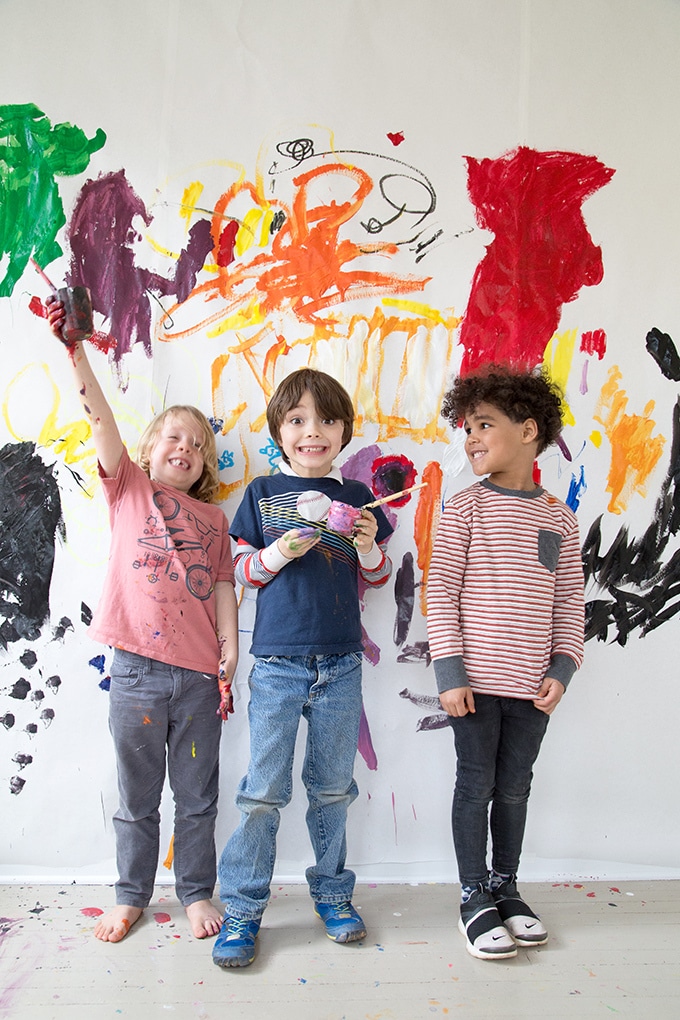
Sponge Painting
During craft time, children can explore their creativity and develop their artistic skills by engaging in the activity of sponge painting. This fun and easy technique allows kids to experiment with different colors and create unique textures on their artwork.
To begin sponge painting, gather a variety of sponges in different shapes and sizes. Dip the sponge into a shallow dish of paint, making sure to cover the entire surface. Then, press the sponge onto a piece of paper or canvas, gently dabbing and twisting the sponge to create interesting patterns.
For a more advanced technique, try layering colors by using multiple sponges. Start with a base color and let it dry before adding a second or third color on top. This will create a beautiful blend of shades and add depth to the artwork.
Sponge painting is a versatile technique that allows children to express themselves freely while honing their artistic skills. So, grab some sponges and let your little ones unleash their creativity with this exciting craft activity!
DIY Wind Chimes
When it comes to DIY wind chimes, the materials you choose can make all the difference. From seashells and beads to metal tubes and old utensils, the possibilities are endless.
And don't forget about the design options! You can create a simple, single-strand chime or experiment with multiple strands for a more complex sound.
Let's explore the materials and design ideas to get you started on your own unique wind chime creation.
Materials for Wind Chimes
One important aspect of creating DIY wind chimes is gathering the necessary materials, which typically include five or more different items. To create unique and personalized wind chimes, you can choose from a variety of materials.
Here are some different types of materials for wind chimes:
Metal: Use old keys, spoons, or bottle caps to create a metallic sound that resonates in the wind.
Glass: Recycle glass bottles or use colorful glass beads to add a vibrant touch to your wind chimes.
Wood: Collect small wooden sticks or driftwood to create a natural and earthy sound.
Shells: Gather seashells or small pieces of driftwood to evoke a calming coastal vibe.
Once you have gathered your materials, you can get creative with different ways to decorate your wind chimes. Paint them in bright colors, add ribbons or beads, or even attach small trinkets or charms. The possibilities are endless, so let your imagination run wild and create wind chimes that reflect your unique style and personality.
Different Chime Design Options
The article explores various design options for DIY wind chimes, allowing kids to create unique and personalized chimes using different materials and decorative elements.
When it comes to chime design inspirations, the possibilities are endless. Kids can draw inspiration from nature by incorporating elements such as leaves, flowers, or seashells into their chimes. They can also experiment with different shapes and sizes, creating chimes in the form of animals, stars, or even their favorite cartoon characters.
As for chime design techniques, kids can explore different ways to assemble their chimes, whether it's using string, wire, or even recycled materials like bottle caps or tin cans.
The key is to encourage their creativity and let their imaginations run wild as they design and create their very own wind chimes.
Cupcake Liner Flowers
Five creative ways to make beautiful flowers using cupcake liners:
Cupcake Liner Bouquet: Gather different colored cupcake liners and stack them together to create a vibrant bouquet of flowers. Secure them with a pipe cleaner or a twist tie and arrange them in a vase for a lovely centerpiece.
Cupcake Liner Wreath: Create a stunning wreath by gluing cupcake liners onto a circular cardboard base. Layer different sizes and colors to add depth and texture. Hang it on your front door or use it as a decorative piece on your wall.
Cupcake Liner Pom Poms: Fold cupcake liners in half, stack them together, and secure them in the middle with a string or pipe cleaner. Gently pull apart the layers to create a fluffy pom pom. Hang them from the ceiling or use them as party decorations.
Cupcake Liner Flower Crown: Attach cupcake liners to a ribbon or elastic band to make a charming flower crown. Decorate the liners with glitter, beads, or stickers for a personalized touch. Wear it for a whimsical and playful look.
These cupcake liner crafts provide endless possibilities for creativity and can be enjoyed by kids and adults alike. Let your imagination run wild and have fun exploring the world of cupcake liner flowers!
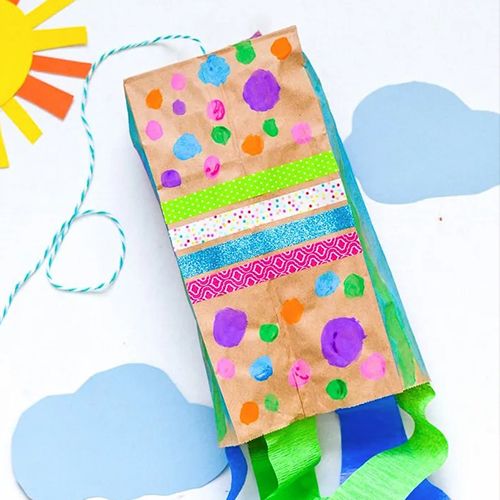
Tissue Paper Suncatchers
Create vibrant and translucent suncatchers using tissue paper. Tissue paper art is a fun and easy craft activity for kids that allows them to explore their creativity and create beautiful decorations for their windows. With a few simple materials, children can learn different suncatcher techniques and produce stunning results.
To make tissue paper suncatchers, start by cutting a piece of clear contact paper in the desired shape and size. Peel off the backing and place it sticky side up on a table. Next, tear or cut small pieces of colorful tissue paper and stick them onto the contact paper. Encourage kids to experiment with different colors and layering techniques to create a vibrant effect.
Once the tissue paper is arranged to their satisfaction, cover it with another sheet of clear contact paper. Press down firmly to seal the two layers together. Trim any excess contact paper, leaving a small border around the edges.
Finally, hang the finished suncatcher on a window using a piece of string or ribbon. When the sunlight shines through, the tissue paper will create a beautiful stained glass effect, adding a touch of color to any room.
Tissue paper suncatchers are a great way for kids to express their creativity while learning about colors and light. This craft project allows for freedom of expression and encourages children to explore different techniques and combinations of colors.
Frequently Asked Questions
What Are Some Other Materials That Can Be Used to Make Paper Plate Animals?
When making paper plate animals, there are numerous alternative materials that can be used to enhance creativity and variety. Some creative ideas include using colored construction paper, pipe cleaners, googly eyes, feathers, and pom-poms.
How Long Does Homemade Playdough Usually Last?
To make homemade playdough last longer, there are several creative ways to store it. One method is to keep it in an airtight container or plastic bag. Another option is to add a few drops of glycerin or vegetable oil to the dough to increase its longevity.
Can Toilet Paper Roll Crafts Be Made With Different Types of Paper Rolls?
Toilet paper roll crafts can indeed be made with different types of paper rolls. Whether it's using cardboard tubes from paper towels or wrapping paper, the possibilities for creative and fun projects are endless. Let your imagination soar!
What Types of Birds Are Attracted to DIY Bird Feeders?
Different types of birds are attracted to DIY bird feeders based on the types of food used. To attract specific birds, research their preferred diet and design feeders accordingly. To make feeders squirrel-proof, consider using squirrel baffles or placing them in inaccessible areas.
Are There Specific Types of Paint That Work Best for Sponge Painting?
When it comes to sponge painting, it is important to choose the best paint types. Different types of paint, such as acrylic or tempera, can work well for this technique, allowing for vibrant and textured creations.
 Kids Art ProjectsParty PlanningPaper CraftsOrigami for KidsPrivacy PolicyTerms And Conditions
